Vai al contenuto

Nuovo tabellone HQ con zona esterna 3D


DottJake
 Condividi

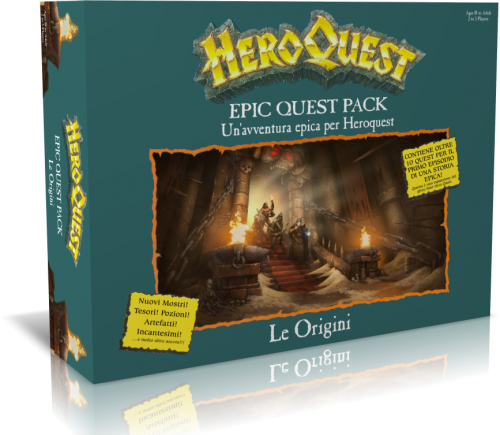
Messaggi raccomandati


  • Gruppo:  Membri
  • Discussioni create:  3
  • Post totali:  184
  • Reputazione:   0
  • Punti:  213
  • Miglior heroquester:  0
  • Iscritto il:  17/05/2006
  • Status:  Offline
  • Connesso:  

Quello che più mi preoccupa di tutto questo lavoro (che è senza dubbio meraviglioso!!!) e colorare il tutto, che come potete notare non si limita ad un colore piatto ma ha varie sfumature per ogni sua parte, dai corridoi alle stanze...


...insomma un lavorone coi fiocchi!!!


magari per lo spazio, si potrebbe pensare di dividere il tabellone in quattro parti da accostare e bloccare insieme in qualche modo...

Darkval

UserBars_HEROQUEST.jpg

Link al commento
Condividi su altri siti

  • Risposte 498
  • Creato
  • Ultima Risposta

Miglior contributo in questa discussione

Miglior contributo in questa discussione

Immagini Pubblicate


  • Gruppo:  HeroquestForger
  • Discussioni create:  55
  • Post totali:  3408
  • Reputazione:   12
  • Punti:  3971
  • Miglior heroquester:  0
  • Iscritto il:  20/02/2006
  • Status:  Offline
  • Connesso:  

io lo farò sicuramente a costo di perdere anni ed anni della mia vita :blob3:

è un lavoro troppo bello x lasciarlo li e nn copiarlo (macari personalizzandolo con colori ed effetti 3D)


Ci proverò anch'io! :blob4: Sarà il mio passatempo vacanziero.


Quello che più mi preoccupa di tutto questo lavoro (che è senza dubbio meraviglioso!!!) e colorare il tutto, che come potete notare non si limita ad un colore piatto ma ha varie sfumature per ogni sua parte, dai corridoi alle stanze...


...insomma un lavorone coi fiocchi!!!

Questo secondo me, sarà la parte più difficile!

Non sò dipingere così bene! :laughing6:


magari per lo spazio, si potrebbe pensare di dividere il tabellone in quattro parti da accostare e bloccare insieme in qualche modo...


Io lo appenderò al muro! :blob5:


PS = Qualcuno potrebbe tradurre la descrizione dal Tedesco all'Italiano?

Innuendo dovrebbe metterci un'attimo!

Arwen, tu conosci il tedesco?


Secondo voi il piano base è compensato o qualche altro materiale.

(giuro che non ho nemmeno tentato d'interpretare il tedesco della descrizione.).

01board9dg.jpg

UserBars_HEROQUEST_gp.jpg

Link al commento
Condividi su altri siti


  • Gruppo:  Membri
  • Discussioni create:  22
  • Post totali:  103
  • Reputazione:   3
  • Punti:  120
  • Miglior heroquester:  0
  • Iscritto il:  08/06/2006
  • Status:  Offline
  • Connesso:  

Un lavoro eccezzionale!!! ci si deve mettere sotto con l'impegno, ma si può tentare... :laughing6:

quasi quasi..

Link al commento
Condividi su altri siti


  • Gruppo:  Membri
  • Discussioni create:  136
  • Post totali:  2555
  • Reputazione:   2622
  • Punti:  2932
  • Miglior heroquester:  339
  • Iscritto il:  16/01/2006
  • Status:  Offline
  • Connesso:  

Tenete presente che nel tabellone tedesco le caselle sono più grandi di quelle normali. Le miniature ci stanno dentro abbondantemente (grande cosa secondo me).

Di conseguenza anche le tiles delle stanze vanno rifatte o ristampate per adattarle.


Ovviamente potete sempre optare per fare le caselle delle dimensioni standard.


Da notare che i corridoi ora sono tutti 2x2 a parte quelli intorno allo stanzone centrale.


Più interessante secondo me è quest'altra versione, modulare:


http://www.hq-cooperation.de/galerie/board/modular/boardbau_modular.html

▶️ myheroquest.blogspot.com ◀️

Link al commento
Condividi su altri siti


  • Gruppo:  HeroquestForger
  • Discussioni create:  55
  • Post totali:  3408
  • Reputazione:   12
  • Punti:  3971
  • Miglior heroquester:  0
  • Iscritto il:  20/02/2006
  • Status:  Offline
  • Connesso:  

Io penso di provarci veramente!

Ho in mente alcune modifiche. Avremo modo di parlarne. :blob5:

(peccato che il thread non sia stato postato in "Modellismo 3D".

Chi modera quest'area?).

Guardando bene il Tab. originale ho notato che lo spessore dei muri interni(2mm) è maggiore della fuga tra le mattonelle(1mm).

Infatti se notate le caselle nei corridoi non sono perfettamente quadrate.

Costruendo questo tabellone 3D, anche i corridoi risulteranno perfetti.

Utilizzando le fughe di 2mm anche tra le caselle, tutto il tabellone risulterà leggermente più grande.(Il tipo fà caselle 3X3cm :blob3: )

Ho pensato di costruirlo su tutti i due lati diversificandoli.

In un lato il tabellone originale con pavimenti dipinti, mentre sul retro solo un pavimento di un unico colore, dove poter inserire i muri a piacimento. Uno "speudo-board-dungeon-modulabile"! :)

Devo studiare bene il tutorial postato dal quel "genio tedesco"! :)


@ Lesto = Non mi piaciono i tabelloni troppo modulabili! :blob4: Il tuo link è utilissimo per la pitturazione! :laughing6:


Tradurre grazie:

Nun werden 5mm starke Korkplatten mit diesem tollen Schneidewerkzeug (zu sehen im Bild) in 3 cm breite Streifen geschnitten.

UserBars_HEROQUEST_gp.jpg

Link al commento
Condividi su altri siti


  • Gruppo:  Membri
  • Discussioni create:  136
  • Post totali:  2555
  • Reputazione:   2622
  • Punti:  2932
  • Miglior heroquester:  339
  • Iscritto il:  16/01/2006
  • Status:  Offline
  • Connesso:  

GP, avevo appena editato il mio post, rileggilo un attimo...

▶️ myheroquest.blogspot.com ◀️

Link al commento
Condividi su altri siti


  • Gruppo:  Membri
  • Discussioni create:  136
  • Post totali:  2555
  • Reputazione:   2622
  • Punti:  2932
  • Miglior heroquester:  339
  • Iscritto il:  16/01/2006
  • Status:  Offline
  • Connesso:  

Te lo traduco in inglese:


Building guidance for a 3 x 3 HeroQuest Spielbrett


--------------------------------------------------------------------------------


Here the building guidance for the 3 x 3 board form compressed by Kelis and Flint well-known from the forum are again in.


--------------------------------------------------------------------------------


Hello allerseits!


Inspired by the board of Ulfhednar (on which we were allowed to play one week recently owing to Coran & Ninni) as well as the numerous suggestions by Zombie, Xarres and many different, we have to decided likewise sketch ourselves a board with a completely new concept. Unfortunately up to Zombies Mach work time and fate are missing to us, in addition we wanted to make some differently over for the master the life to facilitate.


Default:


- A Spielbrett with 3 x 3 cm individual field surface


- Double courses outside and inside


- Further use of the doors from the basic play


- Simple handling of the door list


- Flexible handling if with standard areas one does not work


For this case we work with a novelty: between the individual fields borders (as walls) are put, those the areas compartments. Later the HQ-doors at the base easily nicked thereby it on the borders to stand and no more not slip.


First the sweet Kelis and I bought a board (MDF, 10 mm strongly, € 6. - per m ²), 2 cork mats 5 mm strongly (10 €) and 5 borders 3x7 mm, 1 meter long (Stk. € 0,72)


Then the Spielfläche with notice and a pencil is noted. Always a field 3 cm and then 3 mm place for the borders.


Please forgives, my Digicam is in repair, I my video camera took. The quality is not therefore like that doll.


Now 5mm strong Korkplatten with this mad cut tool (to see in the picture) in 3 cm broad strips are cut.


Now crosswise the individual panels, so the 3 x 3 cm of playing fields develop.


Now the panels are glued on the raster with wood glue (we to take Ponal express).


So the borders are to be added later into the gaps. Advantage: If the space layout should change, I take simply the borders out and change her. Later overlays hold great by the border those for approx. 2 mm over the panels stand out.


So far are we now. It goes too secondly rather fixed


Now the tiles of the areas are carved as on the original board. Kelis is there very skillful.


Subsequently, bond. One must be able oneself to present naturally like that afterwards looks painted.


FINISHED!!!!!! (in any case with the Kleberei)


Here a first priming and color attempt. We experiment with different water-soluble primings.


So, my sweet Kelis was today industrious, and the priming locked. Now we must wait 6 hours and then become it excitingly.


now color comes into the play. While the sweet Kelis with kitchen sponges and wild color blendings is busy, the grimmige Flint made itself to the borders. As expected they fit not at first attempt and must be made gefügig with sandpaper. The areas from Kelis look affengeil, in the photo come not more rüber.


Here we see here the finished board with the circulating borders for the impact insensitivity. In addition it looks better:


Afterwards we in-slit the doors with our new Aldi Dremel. Looks not too mad from downside, but serves his purpose.


Here now still finally a few scenes from the play enterprise. Here can you see also beautiful, how to the 3x3 the overlays adapted integrate themselves field.


So, new parts! As the first Kelis planned the rubble markers. With help of our Goblins she arranged the surplus cork panels as in and two-field marker. The Goblin tinkered ALL a field markers, Kelis the large. For this cork was torn up and stuck together with Steinchen from the tinkering shop on the plates.


Then Kelis primed the plates.


And now, as highlight, it painted and with MOO bits (likewise from the tinkering shop) garniert it madly.


… and here once again “the rubble” in Action:


Our new trap markers. I thought it am to look also beautiful. I put now always the markers (with it I the trap positions to note can) with the question mark upward. If the trap is defused, and/or the heroes reinplumpsen, them are turned. Between the two skeletons is the Speerfalle. Actually there is no marker for those, but the eye eats as well known also. 3x3 cm largely and afterwards laminates.

▶️ myheroquest.blogspot.com ◀️

Link al commento
Condividi su altri siti


  • Gruppo:  HeroquestForger
  • Discussioni create:  55
  • Post totali:  3408
  • Reputazione:   12
  • Punti:  3971
  • Miglior heroquester:  0
  • Iscritto il:  20/02/2006
  • Status:  Offline
  • Connesso:  

Personalmente penso di usare "mattonelle" di sughero di 2x2 cm. Con le fughe da 2mm, le miniature staranno comodissime!

Il tabellone modulabile è stato ideato dalla stessa mente! Quell'uomo è veramente "geniale". :laughing6:

UserBars_HEROQUEST_gp.jpg

Link al commento
Condividi su altri siti


  • Gruppo:  Membri
  • Discussioni create:  136
  • Post totali:  2555
  • Reputazione:   2622
  • Punti:  2932
  • Miglior heroquester:  339
  • Iscritto il:  16/01/2006
  • Status:  Offline
  • Connesso:  

Questo invece è per la pagina del dungeon modulare:


Building guidance for a modular 3 x 3 HeroQuest Spielbrett


--------------------------------------------------------------------------------


Here are the building guidance for a modular 3 x 3 board of Kelis and Flint.


Default:


- A modular HeroQuest Spielbrett with 3 x 3 cm individual field surface


- Double courses


- Further use of the doors from the basic play


Material:


- 1 cork mat, 5 mm strongly (5 €)


- 1 cabinet rear wall as a cousin. Who does not have sowas, a thin plywood plate for little money from the building market takes, approx. 3-4 mm of strength


- Something color on Acryllbasis


The whole begins times again with the cutting of 3 x 3 cm large cork panels as here described.


With a fret saw we sawed the cabinet rear wall into the parts, which we need afterwards. The wooden plates were primed with Acryllfarbe grey from both sides, in order the all well-known “bend” to prevent. We used a foam material role.

The positions of the panels became subsequently, drawn.


In order to facilitate the difficult priming of the adhesive panels, we painted this mark the panels at the sides before gluing on.


Now the cork panels are glued on the wooden plates.


The remainder painting can be made.


The priming is finished.


Here all parts lie. Above the courses are, down the areas.


Exactly as on the firm Spielbrett the color with a mark kitchen sponges “is dabbed” in several situations: Only the basic colour and then in courses always new layers with other shades, following each other further.


The courses are to be clarified all in grey held around the demarcation between course and areas.


Finished. Here now a few Impressionen, so that you that can present you.

▶️ myheroquest.blogspot.com ◀️

Link al commento
Condividi su altri siti


  • Gruppo:  HeroquestForger
  • Discussioni create:  55
  • Post totali:  3408
  • Reputazione:   12
  • Punti:  3971
  • Miglior heroquester:  0
  • Iscritto il:  20/02/2006
  • Status:  Offline
  • Connesso:  

Grazie! :blob3:

Domani andrò alla ricerca del materiale!

(quando GP prende la "sbandata", non perde tempo).

Prevedo un lavoro lungo e pieno di imprevisti. :laughing6:

UserBars_HEROQUEST_gp.jpg

Link al commento
Condividi su altri siti

Crea un account o accedi per lasciare un commento

Devi essere un membro per lasciare un commento

Crea un account

Iscriviti per un nuovo account nella nostra community. È facile!

Registra un nuovo account

Accedi

Sei già registrato? Accedi qui.

Accedi Ora
 Condividi

  • Benvenuto heroquester!

    Barbaro.png

    Ciao heroquester e benvenuto sul Forum Italiano di HeroQuest. Per poter accedere a tutte le aree del Forum devi essere iscritto.


  • Epic Quest Logo.png

    La più grande saga mai scritta per HeroQuest.
    Un'avventura indimenticabile.

    In Italiano. Gratis.
    Per tutti i membri del Forum Italiano di HeroQuest!

    EpicQuest_3DBox_Fronte.thumb.png.036f5da552fb4988b648ceca1a4f46c4.png

×
×
  • Crea Nuovo...

Informazioni importanti

Navigando sul Forum ne accetto i Terms of Use